Fall crafts are a good way to use paper, paint, and a few leaves from the yard. These projects are simple enough for a weekend afternoon, with several options for toddlers, preschoolers, and older kids. Set out one project at a time, protect the table, and let each child choose the colors and details.
For more low-prep ideas, see Fall Crafts for Preschoolers: simple, safe, and cozy ideas and Toddler Fall Crafts You Can Do Together.
10 Easy Fall Crafts for Kids
| Craft | Recommended age | Difficulty | Estimated time | Key materials | Cleanup level |
|---|---|---|---|---|---|
| Paper Plate Leaf Wreath | 3+ | Easy | 30 minutes | Paper plate, paper leaves, glue | Low |
| Pinecone Owls | 5+ | Easy | 30 minutes | Pinecones, felt, glue, eyes | Medium |
| Apple-Stamped Art | 2+ | Easy | 20 minutes | Apple, paint, paper | Medium |
| Paper Pumpkin Garland | 5+ | Easy | 45 minutes | Orange paper, string, glue | Low |
| Leaf Rubbing Collage | 3+ | Easy | 25 minutes | Leaves, crayons, paper | Low |
| Handprint Tree | 3+ | Easy | 30 minutes | Paper, brown and fall-colored paint | Medium |
| Corn Cob Painting | 4+ | Easy | 30 minutes | Corn cob, paint, paper | Medium |
| Acorn Characters | 5+ | Easy | 25 minutes | Acorns, markers, glue, paper scraps | Medium |
| Tissue Paper Fall Tree | 3+ | Easy | 35 minutes | Paper, tissue paper, glue | Low |
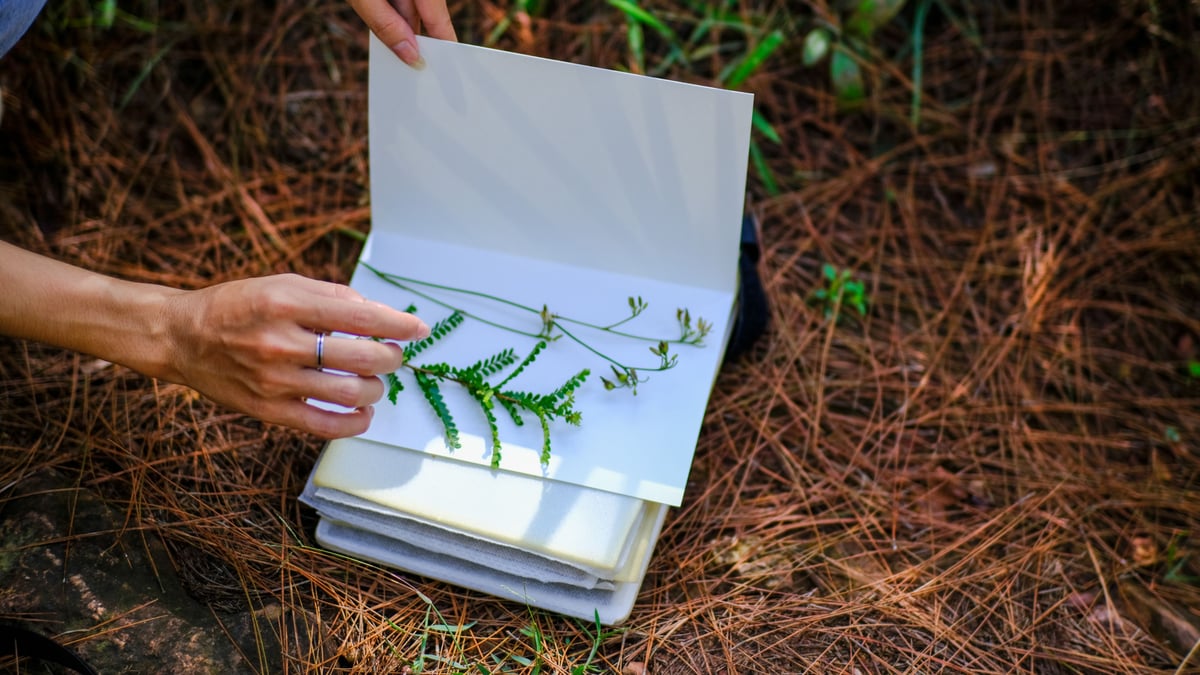
| Nature Bookmark | 5+ | Easy | 30 minutes | Cardstock, leaves, clear contact paper | Low |
1. Paper Plate Leaf Wreath
Cut the center from a paper plate, leaving a ring about 2 inches wide. Cut 12 to 15 leaves from red, orange, yellow, and brown paper. Children can draw veins on the leaves with a crayon before gluing them around the plate.
Let the wreath dry for 20 minutes. Add a loop of yarn to the top for hanging. For a faster version, use real leaves that have been pressed flat under a book overnight.
2. Pinecone Owls
Use one dry pinecone for each owl. Cut two felt circles for the eyes, one small triangle for the beak, and two simple wing shapes. Glue the pieces to the pinecone, then add small paper or craft eyes.
A flat-bottomed pinecone is easier to decorate. If the pinecone rolls, place it on its side and make the owl a sitting woodland character instead. Allow the glue to dry for 30 minutes before moving it.
3. Apple-Stamped Art
Cut an apple in half across the middle. Pour a thin layer of red, yellow, or green washable paint onto a plate. Press the cut side of the apple into the paint, then stamp it onto white paper.
Use a brown marker to add stems and green paper for leaves. One apple half makes several stamps before it needs more paint. Leave the picture flat for 20 minutes so the paint can dry.
4. Paper Pumpkin Garland
Cut 10 orange paper strips, each 1 inch wide and 8 inches long. Stack the strips and punch a hole at both ends. Join the ends with brass fasteners, then spread the strips into a round pumpkin shape.
Cut small brown stems and green leaves from paper. Glue them to the top of each pumpkin, then thread the pumpkins onto a length of string. Space them 3 to 4 inches apart and hang the garland across a shelf or window.
5. Leaf Rubbing Collage
Place a dry leaf under a sheet of thin paper, with the veined side facing up. Hold the paper still and rub the side of a peeled crayon over the leaf. Use short strokes from the center toward the edges.
Make six to eight rubbings in different colors. Cut out a few of the shapes and glue them onto a larger sheet of paper. A mix of whole rubbings and cut leaves gives the collage more variety.
6. Handprint Tree
Trace one hand and the lower part of the forearm onto brown paper, then cut it out to make the trunk and branches. Glue it to a sheet of blue or cream paper.
Cut or tear small leaves from red, orange, yellow, and green paper. Glue them to the branches and scatter a few below the tree. For a painted version, brush brown paint over the hand and forearm, press it onto the paper, and wash hands right away.
You can keep this project as a yearly record. Add the child’s name and the year near the bottom. For more variations, try Fall Handprint Crafts that Grow with Kids.
7. Corn Cob Painting
Cut a clean corn cob into two pieces, or use a small cob that fits comfortably in a child’s hand. Add a thin layer of paint to a tray. Roll or press the cob through the paint, then make prints across a sheet of paper.
Use yellow paint for corn, or try orange, brown, and red for a fall pattern. Add a paper stem and leaves to turn each print into a corn plant. Set the page aside for 30 minutes before stacking it with other artwork.
8. Acorn Characters
Choose large acorns with unbroken caps. Draw faces with permanent markers, or glue on small paper features. Add yarn hair, paper hats, or tiny felt scarves.
To make an acorn family, give each character a different expression and color. Glue the figures to a scrap of cardboard so they can stand. Keep loose pieces in a shallow tray while children work.
9. Tissue Paper Fall Tree
Draw a simple tree trunk and branches on paper, or glue down a brown paper cutout. Tear red, orange, yellow, and brown tissue paper into pieces about 1 inch wide.
Children can crumple each piece into a loose ball and glue it to the branches. Add a few pieces to the ground for fallen leaves. Use a small amount of glue for each piece and leave the finished tree flat for 30 minutes.
10. Nature Bookmark
Cut cardstock into strips 2 inches wide by 6 inches long. Arrange small, dry leaves on one side. Secure the leaves with glue, then cover the front and back with clear contact paper.
Trim the edges and punch a hole at the top for a ribbon. Press the contact paper down slowly to avoid wrinkles. Keep the leaves small and flat so the bookmark fits between book pages.
Fall Craft Supply List
Basic Supplies to Keep on Hand
A small craft box can cover most of these projects. Keep white and colored paper, cardstock, paper plates, washable paint, crayons, markers, child-safe scissors, glue sticks, liquid glue, yarn, string, and paper fasteners together.
A shallow tray helps contain small pieces. Add newspaper or a reusable tablecloth for paint projects. Paper towels and a cup of water make quick cleanup easier.
Natural Materials to Collect
Leaves, pinecones, and acorns work well for fall crafts. Pick dry materials that are free from visible mold, insects, or soft spots. Let damp pieces dry on newspaper before using them.
Use larger natural pieces for younger children and keep small parts with an adult during projects. Do not put natural materials in a child’s mouth, and wash hands after handling them.
Low-Cost Substitutions
Use cereal-box cardboard instead of cardstock. A paper grocery bag can replace brown construction paper, and a clean jar lid can hold paint. Replace craft eyes with circles cut from white and black paper.
A paper plate can become a paint palette, and old magazines can supply colored paper for leaves, pumpkins, and collage pieces.
Fall Crafts by Age and Skill Level
Best Crafts for Toddlers and Preschoolers
Apple stamping, leaf rubbing, handprint trees, and tissue paper trees suit short attention spans. Prepare the paper and paint first, then offer one or two colors at a time. Adults should handle cutting and stay close when small pieces or liquid glue are in use.
For more ideas aimed at little hands, try Fall Coloring Pages for Kids: Free Ideas and Easy Activities.
Easy Projects for Ages 5 to 8
Children in this range can cut paper leaves, build pumpkin garlands, and assemble pinecone owls with help. Let them plan a color scheme before gluing. A 30- to 45-minute session is enough for one project without rushing.
More Detailed Crafts for Older Kids
Older children can make nature bookmarks, layered wreaths, and acorn characters with small paper details. They can also create a fall display by combining several finished pieces on one shelf or bulletin board.
How to Keep Fall Crafts Safe and Manageable
Choose Washable Materials
Washable paint and glue are easier to clean from hands and tables. Use markers on a protected surface and keep paint in small amounts so it does not spill across the table.
Supervise Small Parts and Scissors
Use child-safe scissors and show children how to carry them with the blades closed. Stay nearby when projects include acorns, craft eyes, paper fasteners, or other small pieces.
Protect the Table and Plan Cleanup
Cover the work surface before opening paint. Give each child a tray or sheet of scrap paper for loose pieces. When the project ends, return unused supplies first, wipe the table, and wash paint from hands before it dries.
How Long Each Craft Takes
Quick Crafts Under 15 Minutes
Apple stamping can take 10 to 15 minutes once the paint and paper are ready. A few leaf rubbings are also quick. These projects work well before lunch, after school, or when you have limited time.
Projects for a One-Hour Activity
Pumpkin garlands, pinecone owls, wreaths, and nature bookmarks take about 30 to 45 minutes, including setup and cleanup. Add drying time if children use liquid glue or several layers of paint.
Crafts to Finish Over Several Days
A large wreath, a collection of acorn characters, or a nature display can be completed in stages. Collect and dry the materials on the first day, assemble the pieces on the second, and add details after the glue has set.
Common Fall Craft Problems and Easy Fixes
What to Do When Glue Will Not Dry
Too much glue is usually the problem. Lift away thick puddles with the edge of a scrap-paper strip, then leave the piece flat with space around it. Liquid glue may need more time than a glue stick.
How to Keep Paper From Curling
Use less paint and avoid soaking the paper. If a page curls, place it between two clean sheets of paper and set a book on top for several hours after it is dry.
How to Preserve Leaf and Nature Crafts
Choose dry, flat leaves and press them before gluing. Once the craft is finished, store it flat in a dry place. Contact paper can protect a bookmark, while a wreath or collage is best kept away from damp areas.
Frequently asked questions
What is the easiest fall craft for kids?
Apple stamping and leaf rubbing are two of the quickest options. Both need only paper, a few colors, and a short setup.
What fall crafts can toddlers do safely?
Toddlers can try apple stamping, leaf rubbing, and tissue paper collage with close adult supervision. Adults should handle cutting and keep small pieces out of reach.
What supplies do I need for easy fall crafts?
Start with paper, cardstock, crayons, washable paint, glue, child-safe scissors, yarn, and a few dry leaves or pinecones.
How can I make fall crafts less messy?
Cover the table, use small amounts of paint and glue, and give each child a tray for loose pieces. Clean the table while the craft dries.
How long do kids' fall crafts usually take?
Quick projects take about 10 to 20 minutes. Garlands, wreaths, and nature crafts usually take 30 to 45 minutes, plus drying time.
Photo credits
Photo (inline 1): Douglas Aircraft Company on wikimedia via Openverse, CC0 1.0