
A moka pot does not need an aggressive flame to make a full, aromatic cup. In fact, the most useful heat adjustment is usually the quiet one: use a gentle stove setting, keep the flame under the base, and take the brewer off the heat when the upper chamber is full.
That simple approach gives the water time to travel upward without turning the finish into a frantic sputter. It also makes the process easier to repeat, because you are watching a steady progression instead of trying to rescue an overheated pot.
This guide focuses only on heat control and the end of the brew. For choosing between brewer types, start with our espresso machine versus moka pot guide. For washing and drying afterward, use the moka pot cleaning routine.
The short answer
Set the burner to low or medium-low heat, depending on your stove and pot size. On gas, the flame should stay beneath the base rather than curling up the sides. Stay nearby. When coffee has filled the upper chamber, remove the pot from the burner promptly.
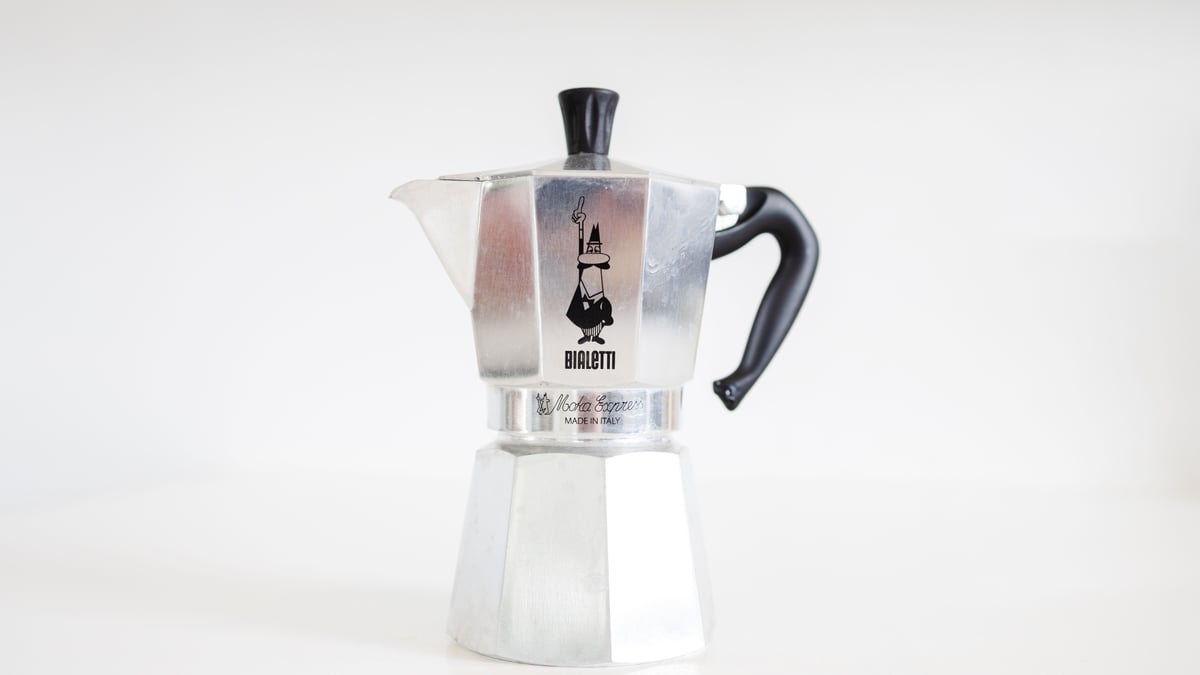
Bialetti’s current support guidance describes low-to-medium heat, says the gas flame should stay under the pot, and advises removing the brewer as soon as the upper chamber is full. Its Moka Express manual also warns against using the highest heat and says to remove the coffee maker after percolation.
The exact dial number is not universal. A compact gas ring, a large electric coil, and an induction adapter transfer heat differently. Treat the manufacturer’s range as the starting point, then note the lowest setting that produces a steady brew on your own stove.
A practical heat-control sequence
- Fill and assemble the brewer according to its instructions. Make sure the rim and threads are clean and the two halves are firmly closed.
- Place the moka pot on a burner no larger than its base. Center it so the heat reaches the bottom evenly.
- Start at low or medium-low heat. On gas, check that no flame is visible around the sides.
- Keep the lid closed while brewing, as the manual instructs. Listen rather than leaning over the spout.
- Allow the coffee to collect in the upper chamber. The process may take several minutes, depending on the pot and heat intensity.
- As soon as the upper chamber is full, move the brewer off the active burner.
- Pour carefully, keeping hands away from hot metal and steam.
This sequence is intentionally plain. It gives you observable checkpoints without turning a simple brewer into a laboratory project.
What “gentle” looks like on different stoves
| Stove type | A sensible starting point | What to watch |
|---|---|---|
| Gas | Low flame centered beneath the base | Flame should not climb the sides |
| Electric coil | Low to medium-low on a coil close to the base size | Residual heat continues after switching off |
| Ceramic glass | Low to medium-low zone matching the base | The surface stays hot after removal |
| Induction-compatible setup | Low setting within the maker or adapter instructions | Pulsing power can make flow less even |
These are starting points, not guaranteed dial positions. If your first attempt takes a little longer but remains calm, that is usually easier to evaluate than a fast, noisy brew. Change only one thing next time: move the dial slightly, keep the same pot and water level, and compare.
Why the burner size matters
A wide gas flame can heat the handle and the brewer’s sides instead of concentrating energy under the boiler. That is both inefficient and uncomfortable. The official instructions specifically say the flame should remain under the coffee maker.
The same principle helps on electric stoves. A very large hotplate can expose more of the body and handle to heat. Choose a zone close to the base diameter and keep the pot centered. If your stove stores a lot of heat, moving the brewer to a cool, heat-safe surface at the finish is more decisive than simply turning the dial to zero.
Never improvise with an unstable trivet or adapter. If your brewer needs an induction plate or other accessory, use equipment intended for that purpose and follow its instructions.
Listen for the finish, but do not wait for drama
Moka pot brewing is easier when you stay within earshot. A calm brew may be quiet at first, followed by a gentle change in sound as the upper chamber fills. You do not need to wait for forceful sputtering to decide the coffee is ready.
The manufacturer’s guidance is clearer than any internet ritual: remove the pot promptly when the upper chamber is full. Leaving it on stored heat can keep cooking the last part of the brew and makes the finish harder to control.
If you are using a new pot, watch the timing from nearby without opening the lid. Once you know the normal rhythm on your stove, the change in sound and the elapsed time become useful cues. A kitchen timer can remind you to check, but it should not replace staying present.
If the brew runs too fast
A very quick, noisy finish suggests that the system is receiving more heat than it needs. On the next attempt, reduce the burner slightly and confirm that the flame or hot zone fits under the base. Do not change grind, dose, water, and heat all at once, because you will not know which change mattered.
Also check the simple setup details. The pot should be properly assembled, the filter and gasket should be in good condition, and the coffee should be loaded according to the brewer’s manual. Heat control cannot compensate for a damaged seal or incorrect assembly.
If the brew seems slow
First make sure the stove is actually transferring heat to the base. Then give the pot time within the manufacturer’s expected range. Bialetti notes that brewing time varies with pot size and heat intensity.
If nothing progresses, stop and let the brewer cool before inspecting it. Do not handle, open, or troubleshoot a pressurized hot pot. Once cool, verify the water level, filter placement, gasket condition, threads, and stove compatibility against your model’s instructions.
For the next brew, raise the heat only a small amount. The goal is a steady result, not the shortest possible time.
A two-brew calibration note
You can usually find a repeatable setting in two or three careful attempts. Write down only four details:
- stove type and burner size;
- dial position;
- approximate time until the upper chamber fills;
- whether the finish was calm or forceful.
On the next attempt, adjust the dial by one small step. This tiny log is more useful than copying someone else’s exact number because it reflects your stove, pot size, and cookware contact.
Once you find a setting that works, keep the rest of the routine stable. Consistency turns heat from a guess into a familiar cue.
Safety and care at the end
The metal body remains hot after brewing. Use the handle, keep fingers away from the body, and set the pot on a stable heat-safe surface. Pour slowly. Let the brewer cool before disassembly and cleaning.
Do not cool a hot brewer by opening it immediately. Follow the manufacturer’s instructions for your model, especially for gasket inspection, replacement parts, and stove compatibility.
Gentle heat is not about making moka pot coffee complicated. It is a way to reduce frantic finishes and give yourself a repeatable point to stop: steady heat underneath, attention nearby, and removal as soon as the upper chamber is full.
Frequently asked questions
Should a moka pot use high heat?
No. Bialetti's current instructions call for low-to-medium heat and warn against the highest heat.
When should I remove a moka pot from the stove?
Remove it promptly when the upper chamber is full, following the maker's instructions for your model.
Should a gas flame touch the sides?
No. Keep the flame underneath the base rather than letting it climb the sides.
Photo credits
Photo (pin 1): Zen Chung on Pexels, Pexels License
Photo (pin 2): Zen Chung on Pexels, Pexels License
Photo (inline 1): Mizuno K on Pexels, Pexels License